55,128 total views, 3 views today
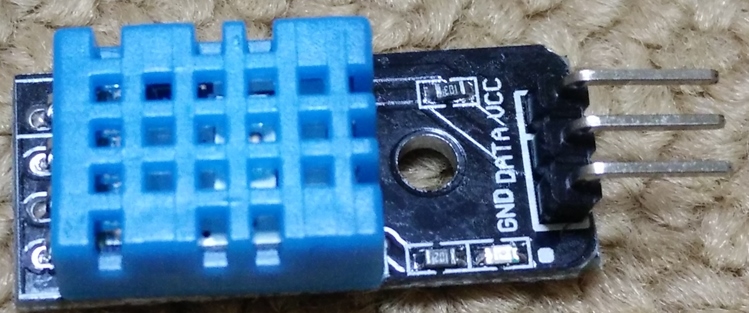
「OSOYOO(オソヨー) Raspberry Pi 学ぶ電子工作キット 初心者演習用パーツセット」には、温度センサーと湿度センサーが一体となった「DHT11」が含まれている。
これは、『カラー図解 最新 Raspberry Piで学ぶ電子工作 作って動かしてしくみがわかる』で推奨されている温度センサーとは異なっているため、本の中で紹介されているプログラムでは、センサーの取得した値を読み取ることができない。
LCD同様、インターネット上で動作させるためのプログラムを探し、HDT11が使えるようになった。
目次
DHT11
「DHT」(digital temperature and humidity sensor)は温度センサーと湿度センサーが一体となったものだが、性能はいまいちのようだ(参考:温湿度センサDHT11をRaspberry Piに繋いでシリアル入力を学ぶ)。
なお、激安温湿度センサDHT11を使ってみたのページによれば、5V以外ではまともに動かない(精度が低い)とのこと。
(おもて面)
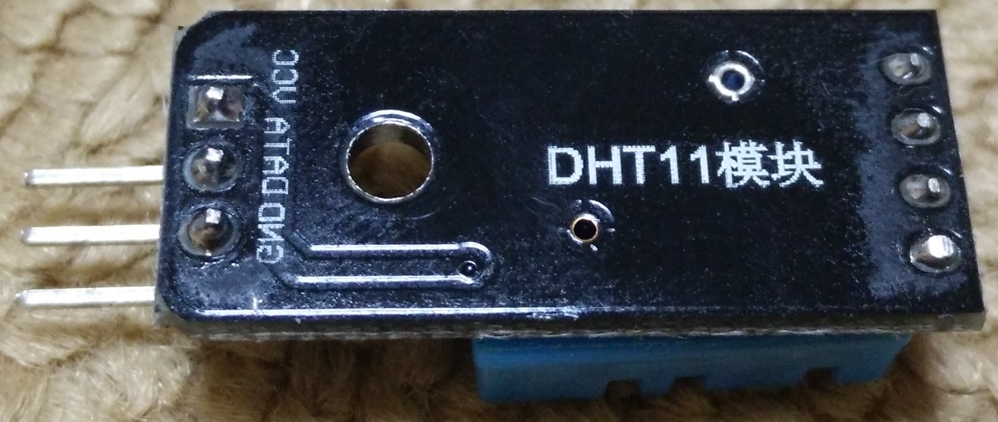
(うら面)
なお、『カラー図解 最新 Raspberry Piで学ぶ電子工作 作って動かしてしくみがわかる』の推奨センサーとは異なり、DHT11はI2C接続ではない。
DHT11の値を読み取るためのプログラム
osoyooの解説ページにある「dht11.py」と「temperature.py」の一部を利用することで、「DHT11」で取得した値を読み取ることができるようになる。
サンプルプログラム
「DHT11」で取得した値をLCDに表示させるプログラムである「temperature.py」から、「DHT11」の値を取得するのに必要な部分だけを抜き出すと次のようになる。
import dht11
import RPi.GPIO as GPIO
import time

# Define GPIO to LCD mapping
Temp_sensor=14

GPIO.setwarnings(False)
GPIO.setmode(GPIO.BCM)       # Use BCM GPIO numbers
instance = dht11.DHT11(pin = Temp_sensor)

while True:
    #get DHT11 sensor value
    result = instance.read()
    if result.is_valid():
        lcd_string("temp:"+str(result.temperature)+" C",LCD_LINE_1)
        lcd_string("humid:"+str(result.humidity)+"%",LCD_LINE_2)
        time.sleep(3) # 3 second delay
このプログラムのコードを一部書き換えて、「DHT11」で取得した値をコンソールに表示させるようにする。
import dht11
import RPi.GPIO as GPIO
import time

# Define GPIO to LCD mapping
Temp_sensor=14

GPIO.setwarnings(False)
GPIO.setmode(GPIO.BCM)       # Use BCM GPIO numbers
instance = dht11.DHT11(pin = Temp_sensor)

while True:
    #get DHT11 sensor value
    result = instance.read()
    if result.is_valid():
        print("temp:"+str(result.temperature)+" C") #「lcd_string」を「print」に置き換えて、第2引数を削除した
        print("humid:"+str(result.humidity)+"%") #「lcd_string」を「print」に置き換えて、第2引数を削除した
        time.sleep(3) # 3 second delay
これで、「DHT11」で取得した値をコンソールに表示させることができるようになった。
「日時」と「温・湿度」を表示させるプログラムと配線
その後、上記で紹介されているプログラムに少し手を加えて、LCDに「日時」と「温・湿度」を3秒ずつ交互に表示できるようにした(要「dht11.py」)。
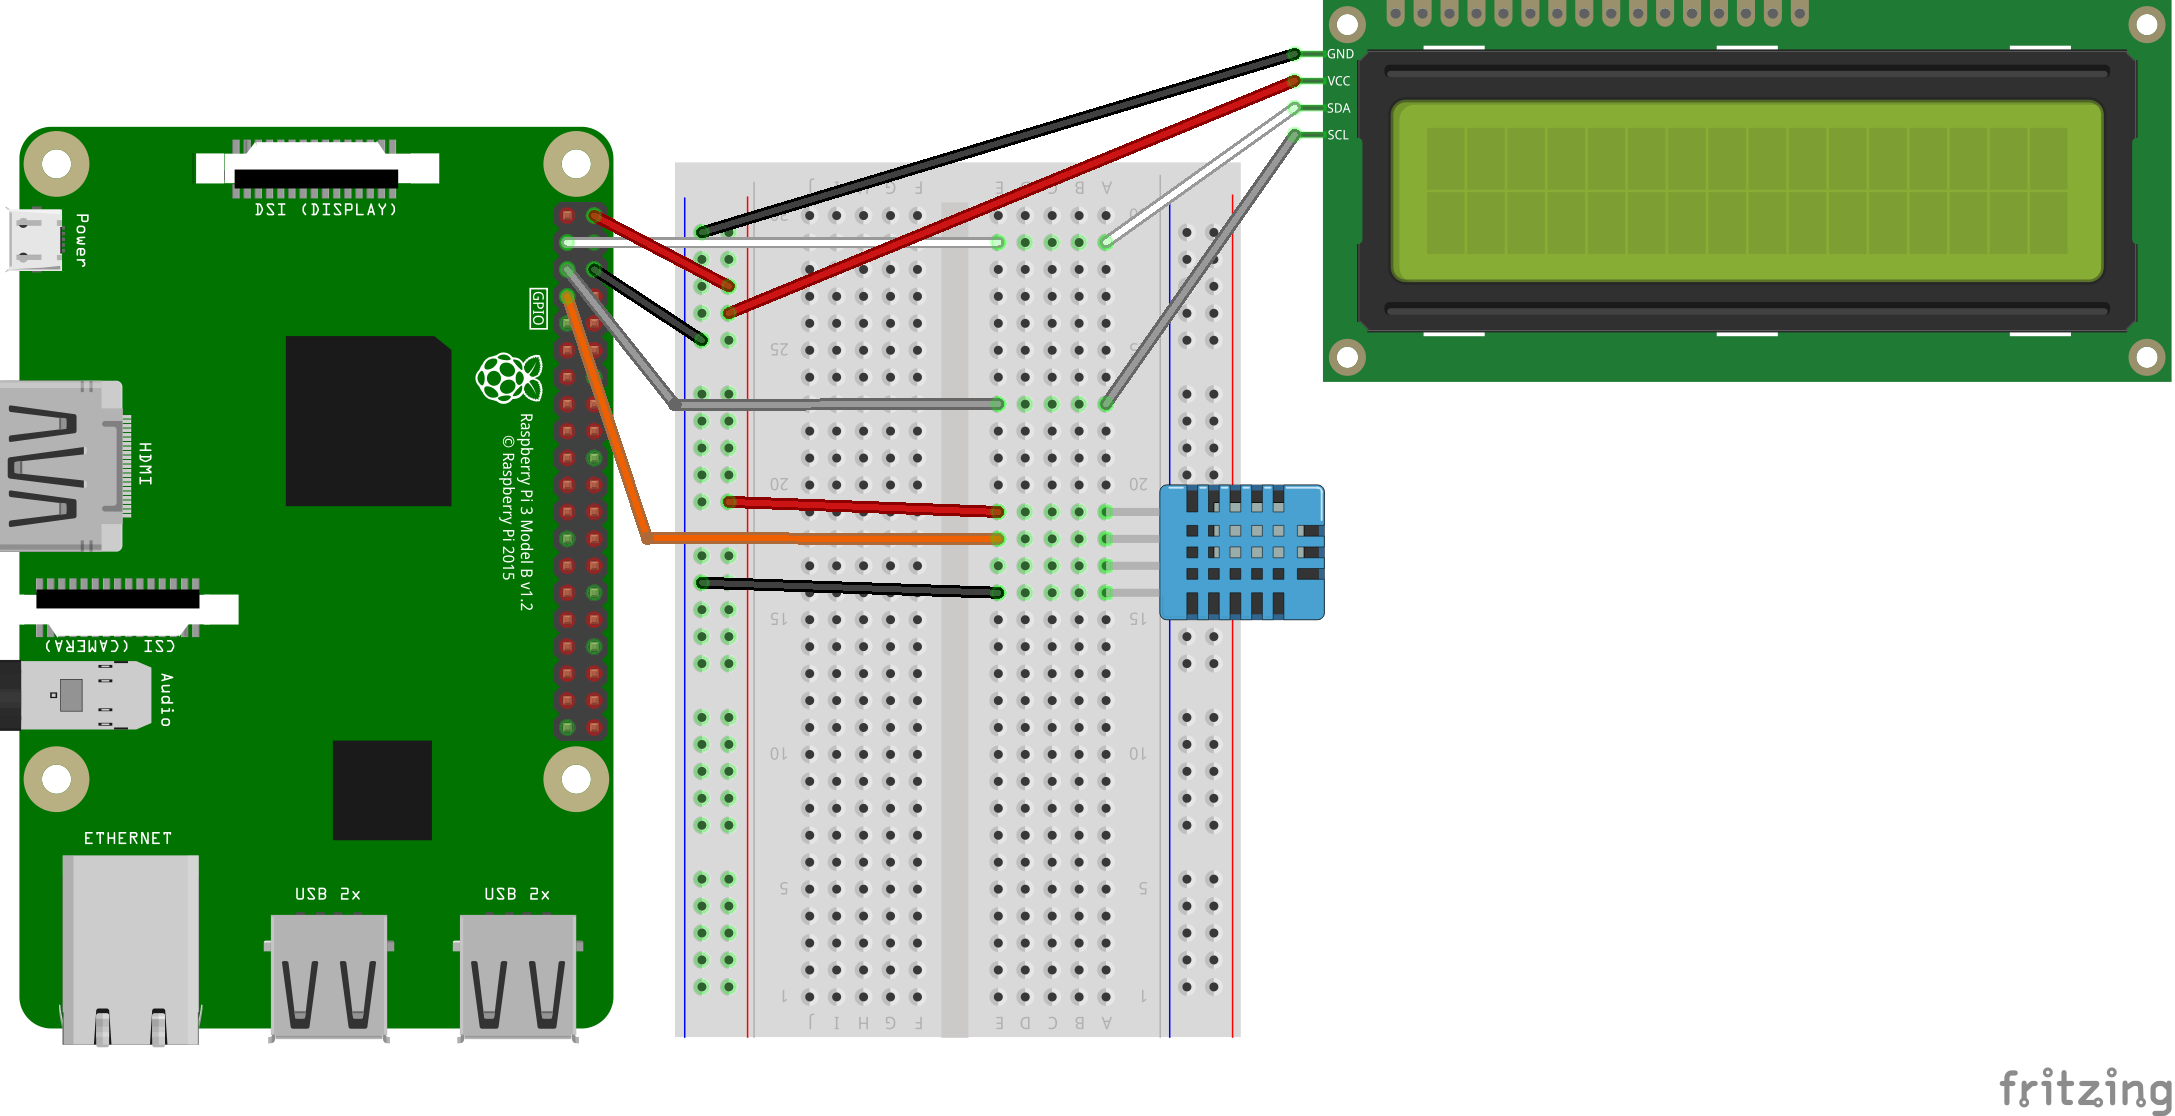
配線
※ラズベリーパイへの入力が5Vになっているので自己責任で
「日時」と「温・湿度」を表示させるプログラム
# -*- coding: utf-8 -*-
#!/usr/bin/python
import RPi.GPIO as GPIO
import dht11 #「dht11.py」が必要
from time import sleep
from time import gmtime, strftime
import datetime
import smbus
#initialize GPIO
GPIO.setwarnings(False)
GPIO.setmode(GPIO.BCM)
GPIO.cleanup()
#read data using pin4
instance = dht11.DHT11(pin=4)
# Define some device parameters
I2C_ADDR = 0x27 # I2C device address
LCD_WIDTH = 16 # Maximum characters per line
# Define some device constants
LCD_CHR = 1 # Mode - Sending data
LCD_CMD = 0 # Mode - Sending command
LCD_LINE_1 = 0x80 # LCD RAM address for the 1st line
LCD_LINE_2 = 0xC0 # LCD RAM address for the 2nd line
LCD_BACKLIGHT = 0x08 # On
#LCD_BACKLIGHT = 0x00 # Off
ENABLE = 0b00000100 # Enable bit
# Timing constants
E_PULSE = 0.0005
E_DELAY = 0.0005
#Open I2C interface
#bus = smbus.SMBus(0) # Rev 1 Pi uses 0
bus = smbus.SMBus(1) # Rev 2 Pi uses 1
def lcd_init():
# Initialise display
lcd_byte(0x33,LCD_CMD) # 110011 Initialise
lcd_byte(0x32,LCD_CMD) # 110010 Initialise
lcd_byte(0x06,LCD_CMD) # 000110 Cursor move direction
lcd_byte(0x0C,LCD_CMD) # 001100 Display On,Cursor Off, Blink Off
lcd_byte(0x28,LCD_CMD) # 101000 Data length, number of lines, font size
lcd_byte(0x01,LCD_CMD) # 000001 Clear display
sleep(E_DELAY)
def lcd_byte(bits, mode):
# Send byte to data pins
# bits = the data
# mode = 1 for data
# 0 for command
bits_high = mode | (bits & 0xF0) | LCD_BACKLIGHT
bits_low = mode | ((bits<<4) & 0xF0) | LCD_BACKLIGHT
# High bits
bus.write_byte(I2C_ADDR, bits_high)
lcd_toggle_enable(bits_high)
# Low bits
bus.write_byte(I2C_ADDR, bits_low)
lcd_toggle_enable(bits_low)
def lcd_toggle_enable(bits):
# Toggle enable
sleep(E_DELAY)
bus.write_byte(I2C_ADDR, (bits | ENABLE))
sleep(E_PULSE)
bus.write_byte(I2C_ADDR,(bits & ~ENABLE))
sleep(E_DELAY)
def lcd_string(message,line):
# Send string to display
message = message.ljust(LCD_WIDTH," ")
lcd_byte(line, LCD_CMD)
for i in range(LCD_WIDTH):
lcd_byte(ord(message[i]),LCD_CHR)
def main():
# Main program block
# Initialise display
lcd_init()
while True:
count = 0
result = instance.read()
if result.is_valid():
# Send some test
lcd_string(strftime("%Y.%m.%d (%a)", gmtime()) , LCD_LINE_1)
while count < 3:
local_time = datetime.datetime.now()
lcd_string(local_time.strftime("%H:%M:%S"), LCD_LINE_2)
sleep(1)
count += 1
# Send some more text
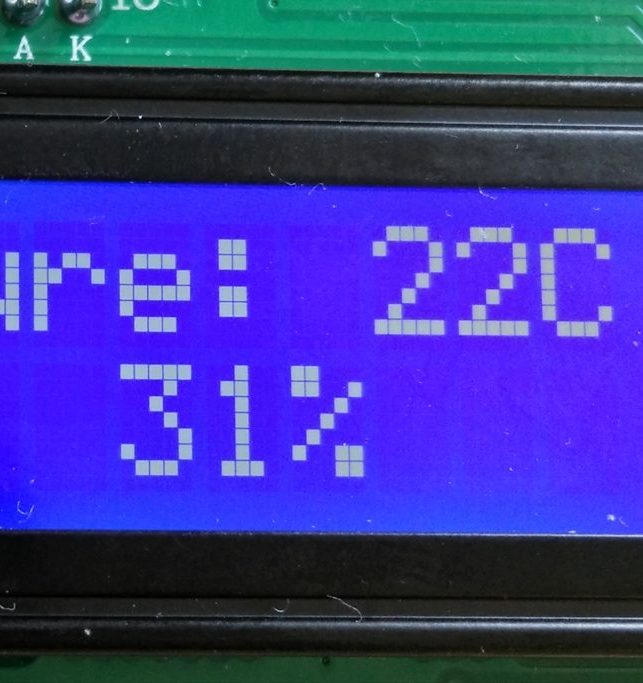
temp = "Temperature: " + str(result.temperature) + "C"
humi = "Humidity: " + str(result.humidity) + "%"
lcd_string(temp, LCD_LINE_1)
lcd_string(humi ,LCD_LINE_2)
sleep(3)
try:
print('Start:' + str(datetime.datetime.now()))
main()
except KeyboardInterrupt:
まとめ
- DHT11の値を読み取るプログラムを探した
- PythonのプログラムによりDHT11の値を読み取れるようになった
- 「日時」と「温度・湿度」を交互にLCDに表示させるようにした
Raspberry Piを先日手に入れ遊んでおります。電子工作が全くの素人の私では、なかなかPythonのプログラムを読むのが難しく理解もいまいちですが、公開いただいたプログラムで動かしてみて何とかLCDに表示することができました。ありがとうございます。
現在OSOYOOのStarter Learning KitにはDHT11が入っています。Tutorialを使用してやってみました。
この記事がお役に立てたようで、良かったです。