46,980 total views, 10 views today
メカナムホイールのWi-Fiラジコンを作ったところで、今度はオムニホイールを試してみたくなった。
しかしながら、いつまでもThingiverseでデータを見繕い、それを出力しているだけでは芸がない。
なので、オムニホイールとラジコン本体のフレームについては、3DCADを使って一から自作することにした。
その他のパーツ(モーターなど)については、もちろん既製品を利用する。
Arduino Uno互換機を使ってメカナムホイールのラジコンカーを作った
スマホで操作できるメカナムホイールのWi-Fiラジコンカーを作った(ESP-WROOM-02)
目次
動作
思っていたより軽快に動作したので満足した。
使用パーツ一覧
| パーツ | 使用品 |
|---|---|
| ESP32 | ESP-WROOM-32開発ボード |
| 車体 | 自作パーツ |
| タイヤ | 自作パーツ |
| モーター | プラスチックギヤードモーター |
| モータードライバ | Dual DCモータードライブキット |
| バッテリー | Anker PowerCore 5000 |
| 電池ケース | 単3×4 スイッチ・カバー付 |
| ブレッドボード | SAD-101 ニューブレッドボード |
| ジャンパワイヤ | オス-オス |
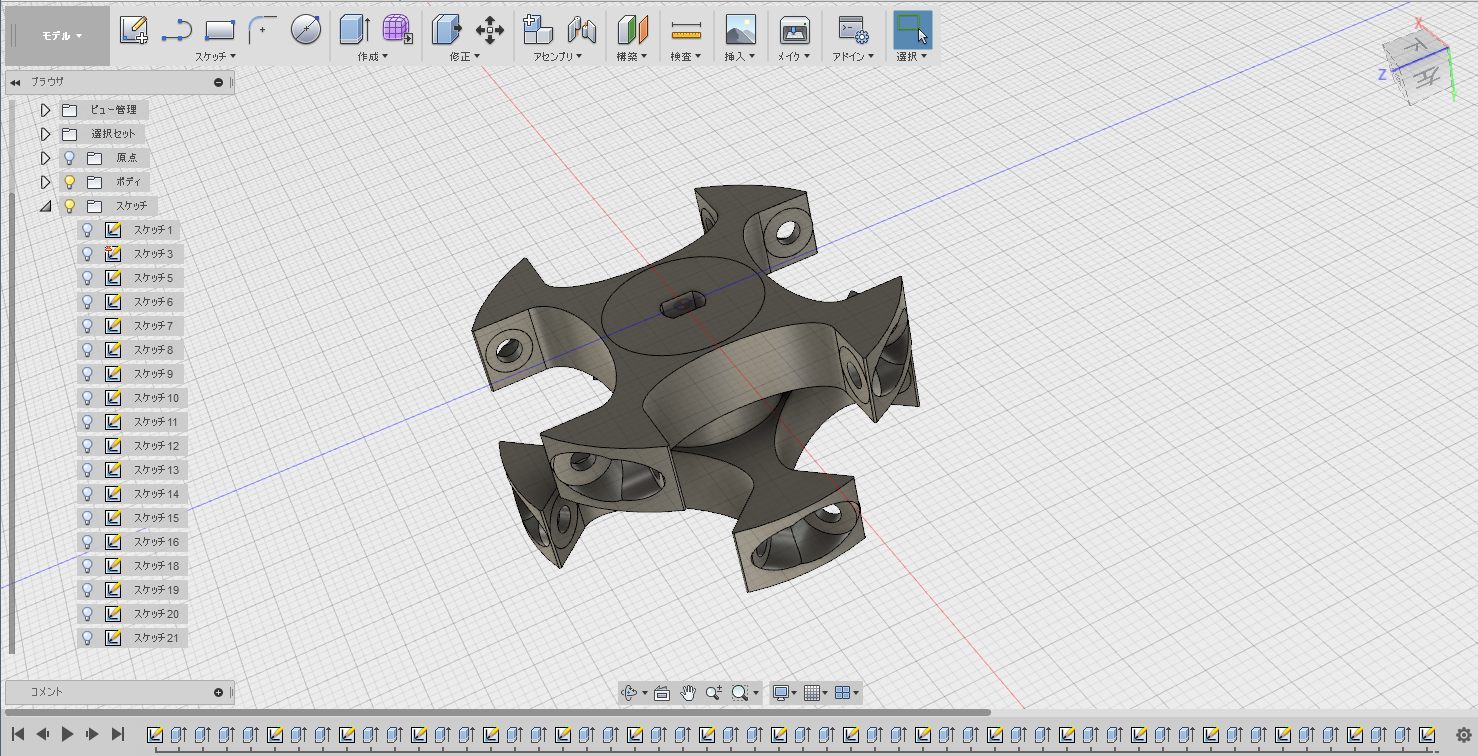
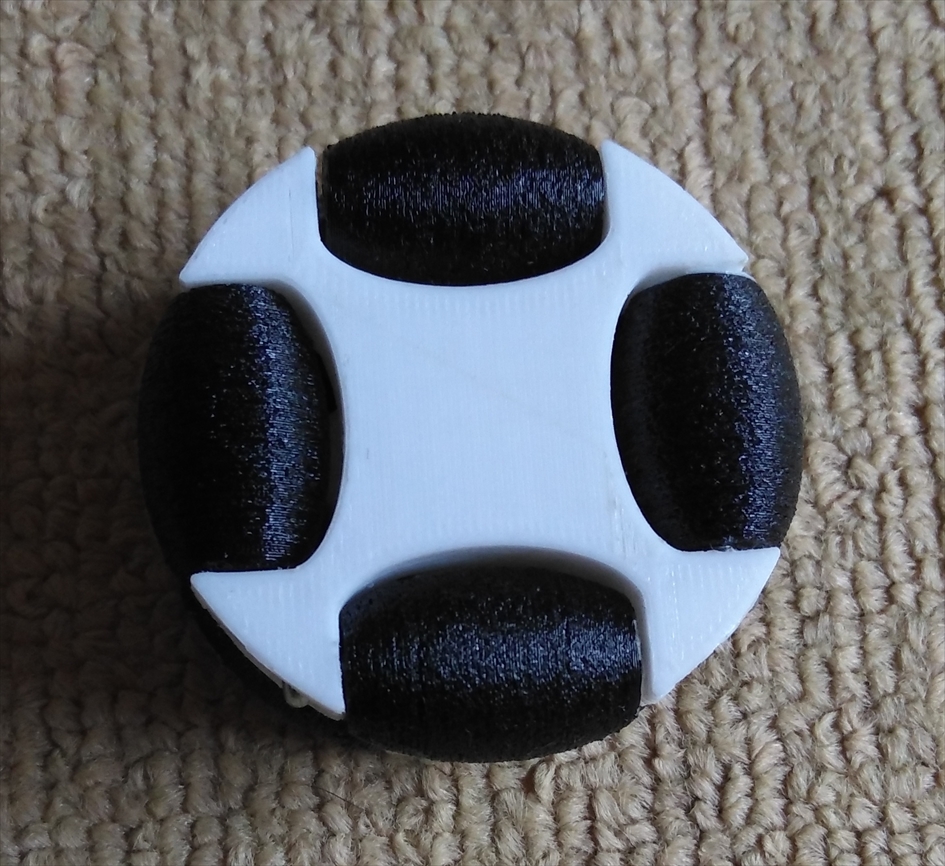
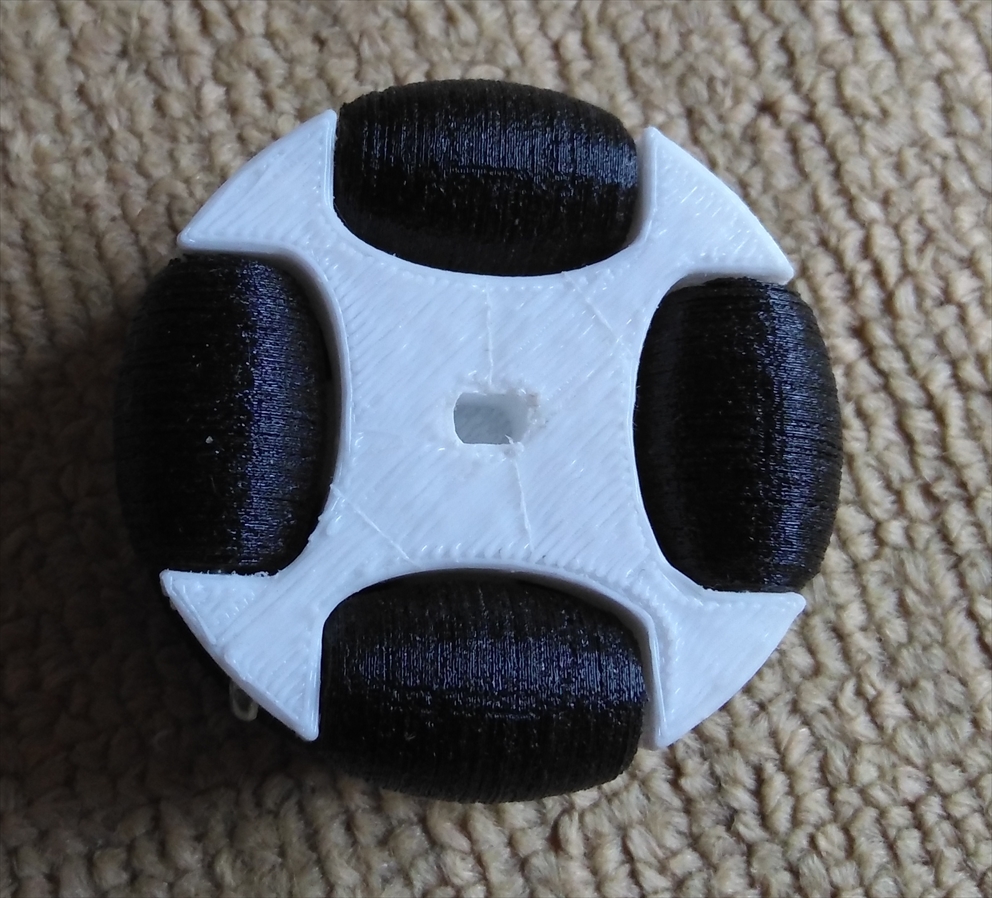
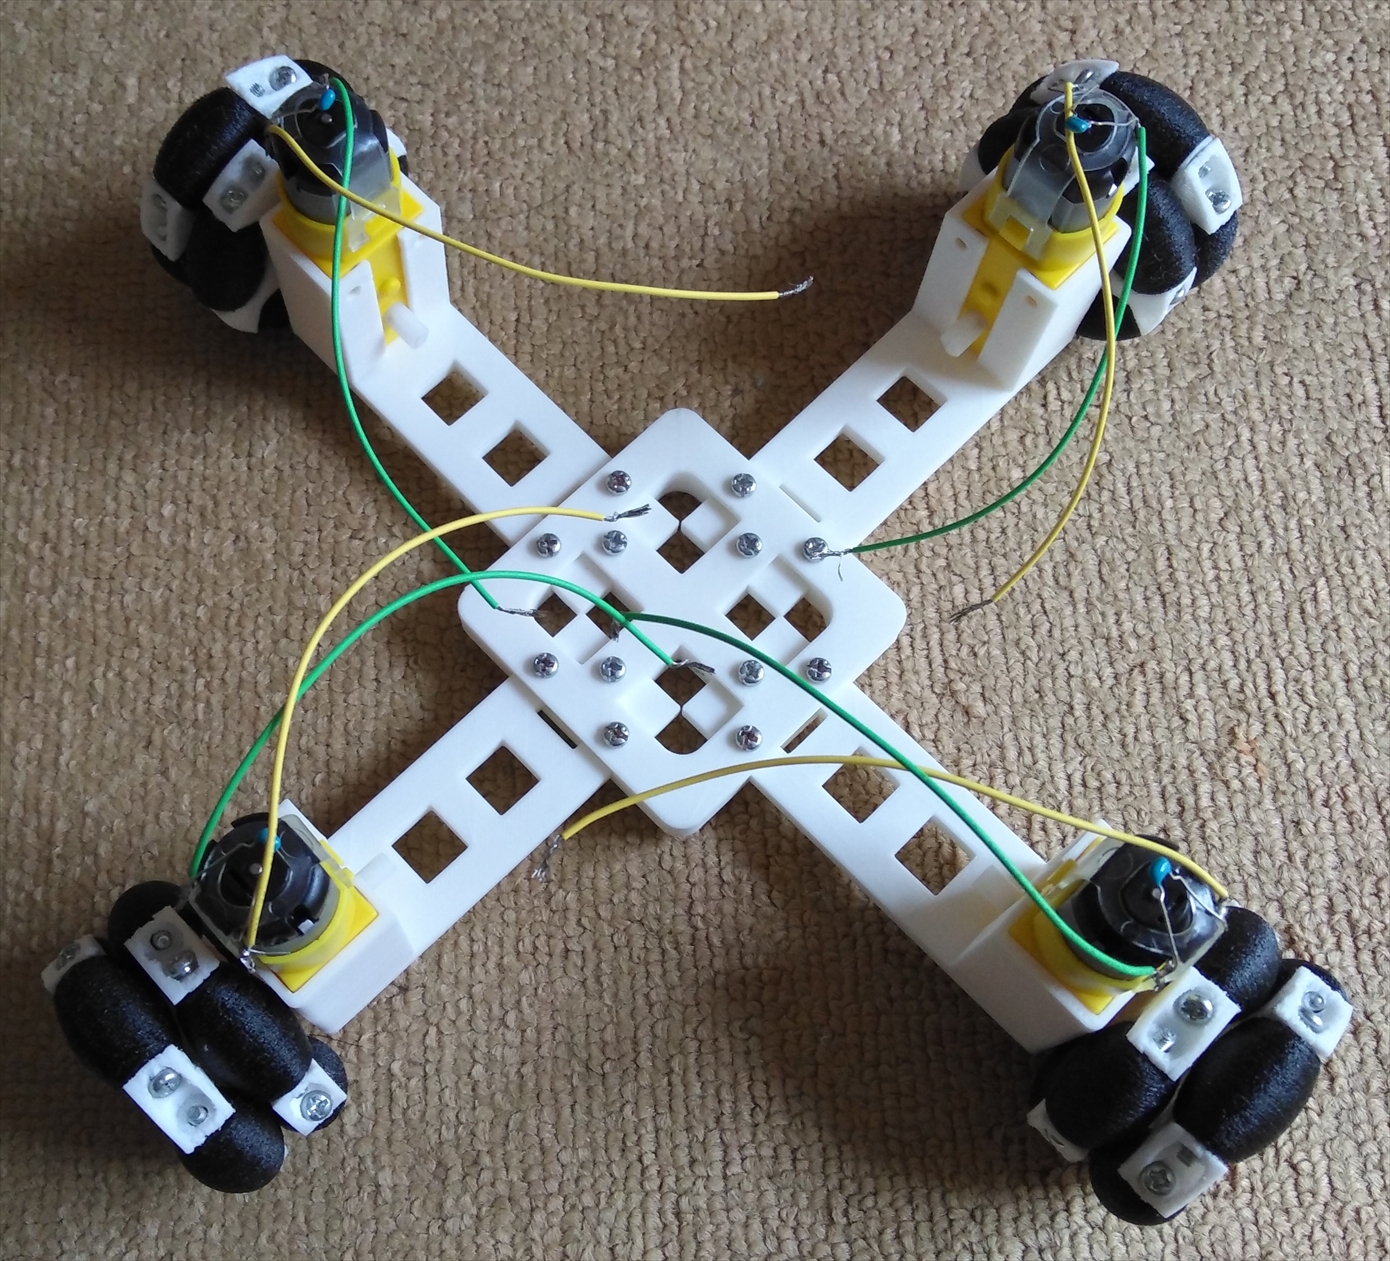
自作オムニホイール
ホイールの設計
Fusion360を使って、オムニホイールを設計した。
今回の経験により、わりと複雑な形のものでも自力で設計できるようになってきた。
Thingiverse:4WD Omni Wheel Robot Car
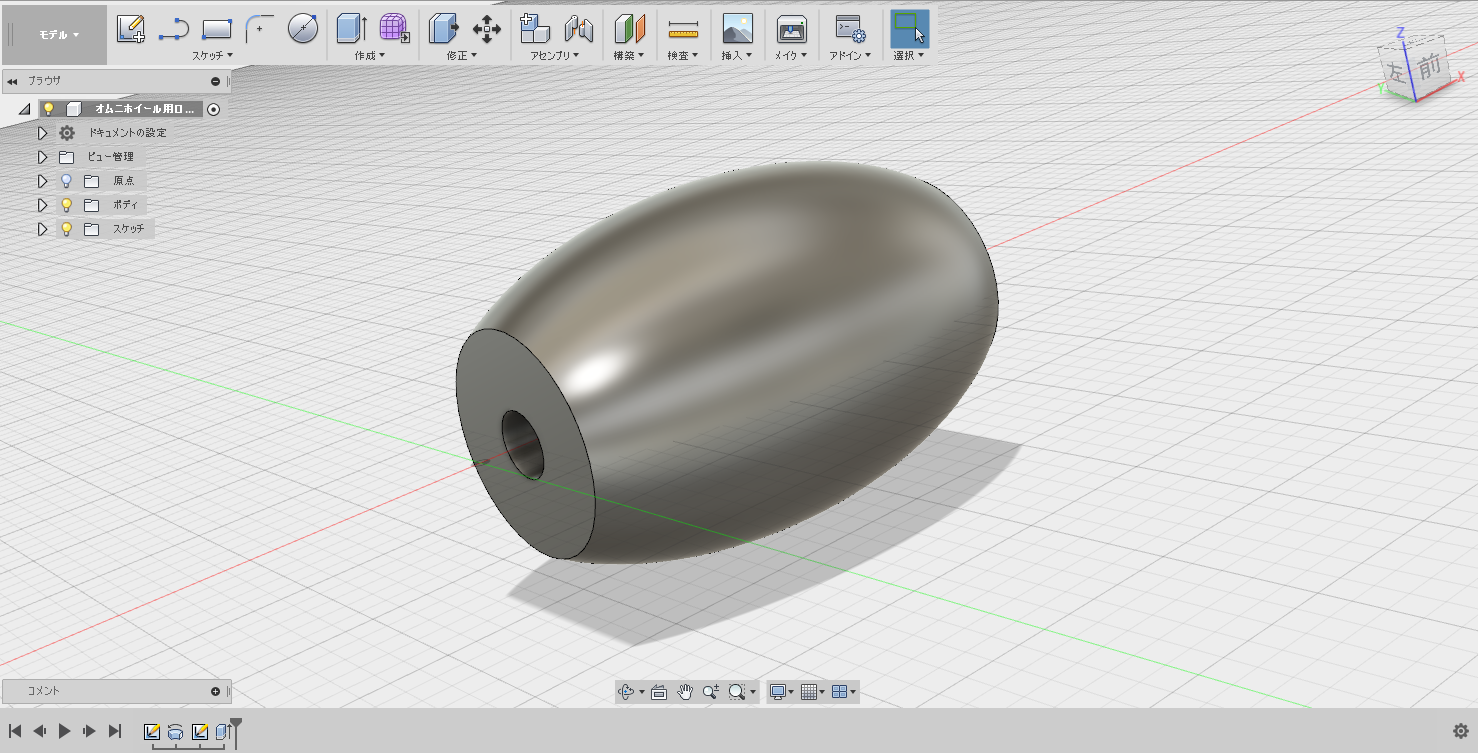
ホイールの出力
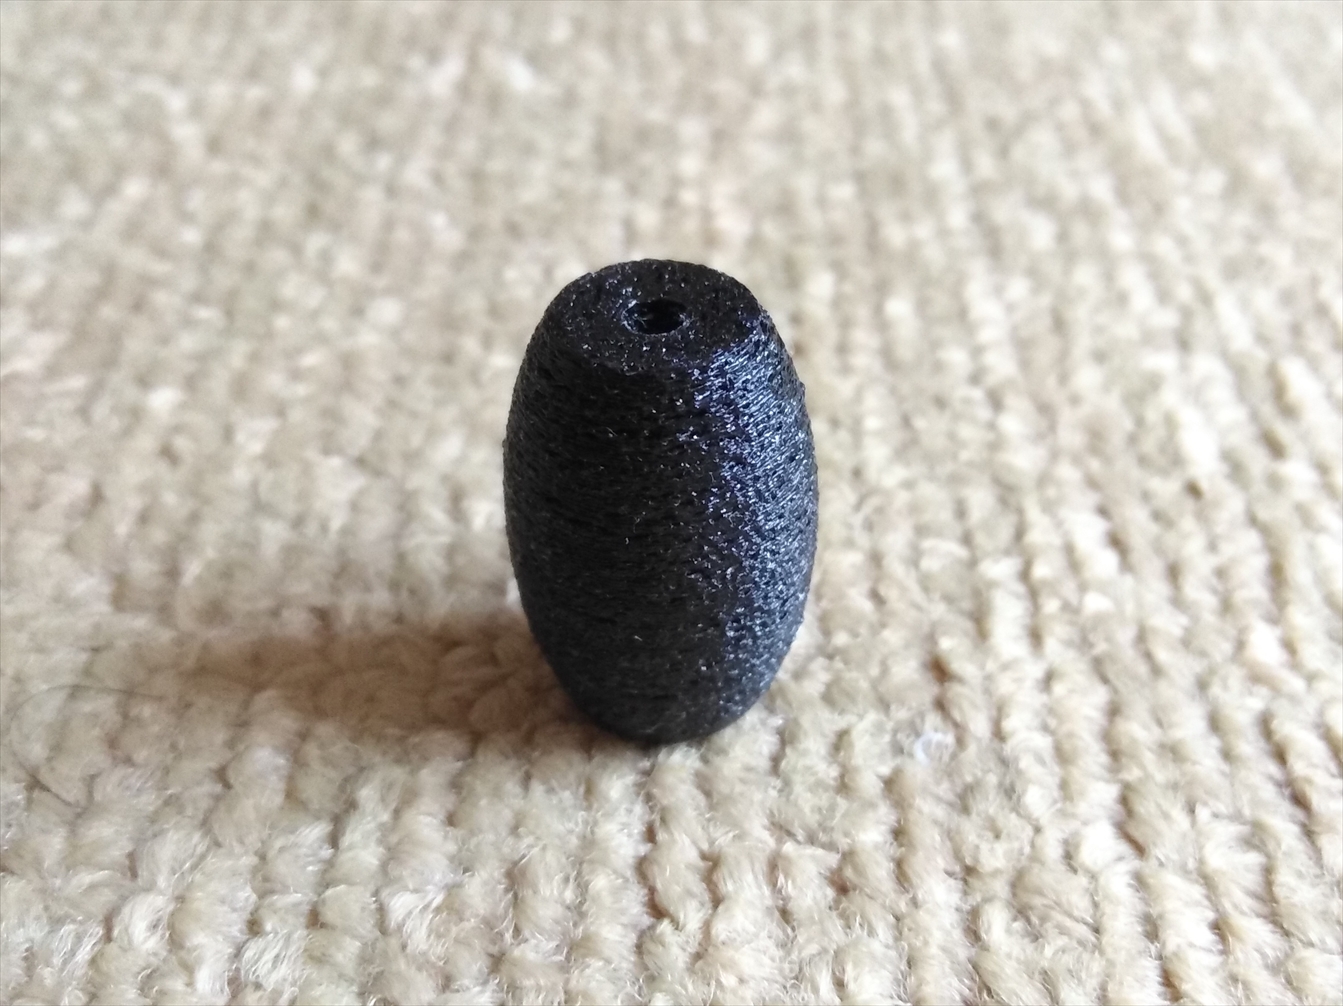
設計したオムニホイールを3Dプリンタで出力した。ちなみに、ホイールはPLAで、ローラーはTPUで出力した。
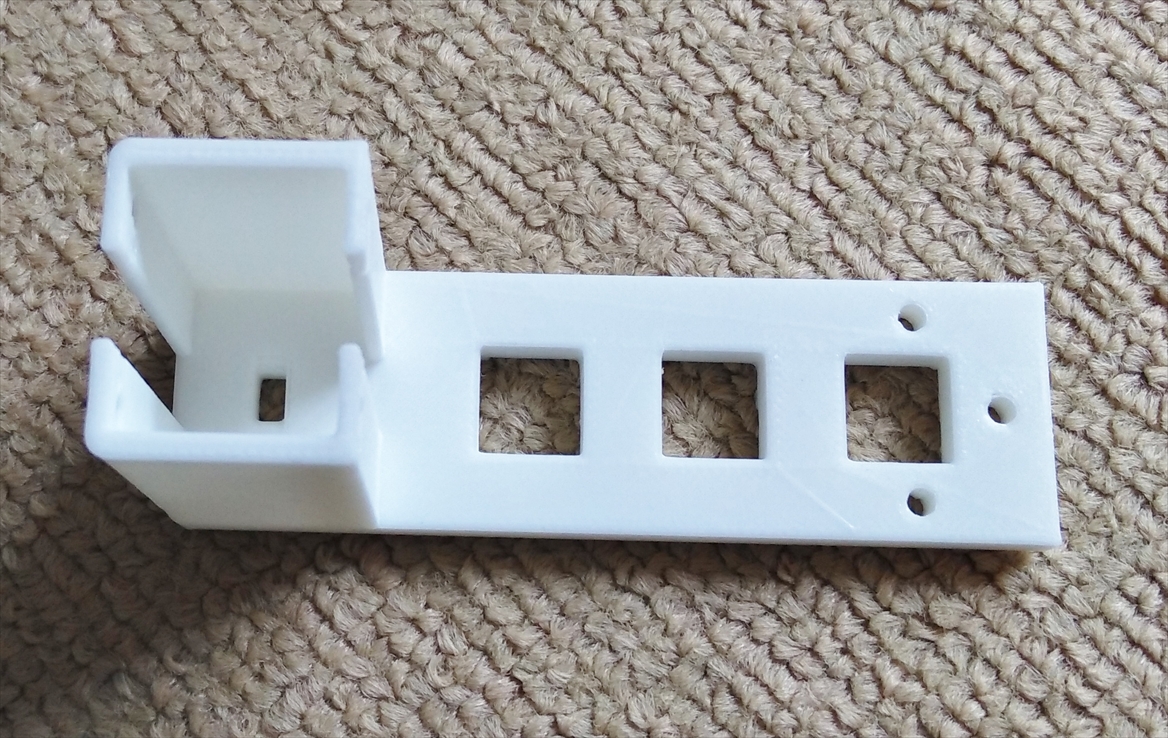
自作フレーム
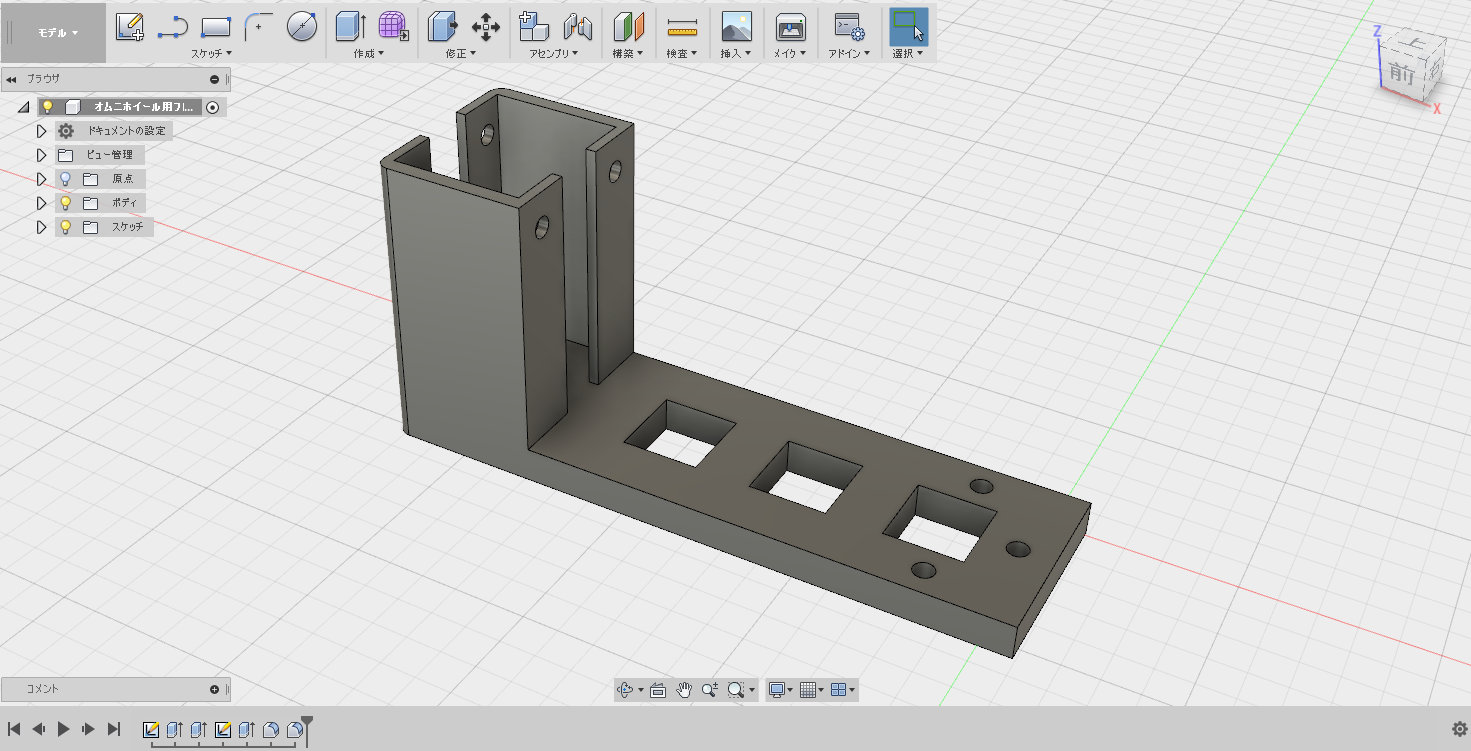
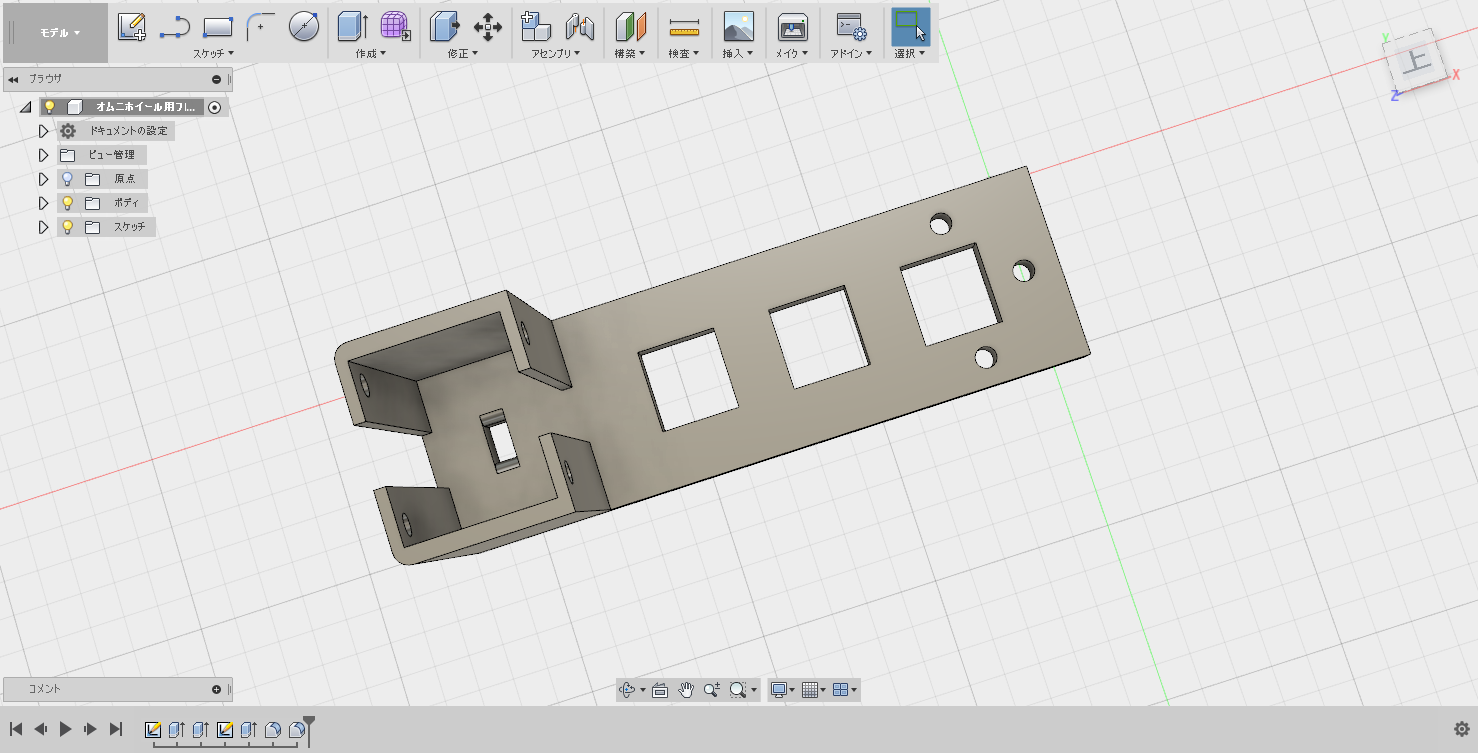
フレームの設計
ラジコンを作るにあたって、フレームも自作してみた。
Thingiverse:4WD Omni Wheel Robot Car
フレームの出力
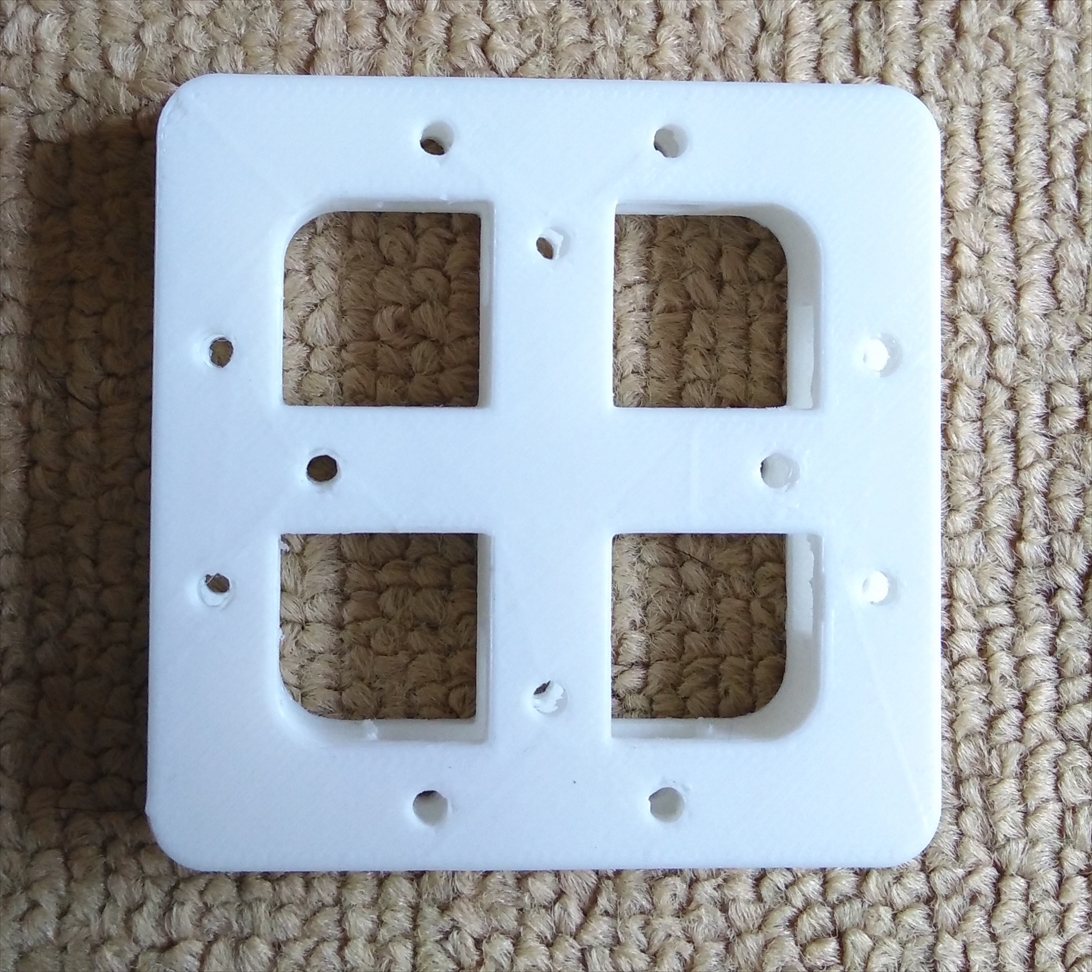
設計したフレームを3Dプリンタで出力した。
1台目としておすすめの3Dプリンター(半完成品でほとんど組立不要)
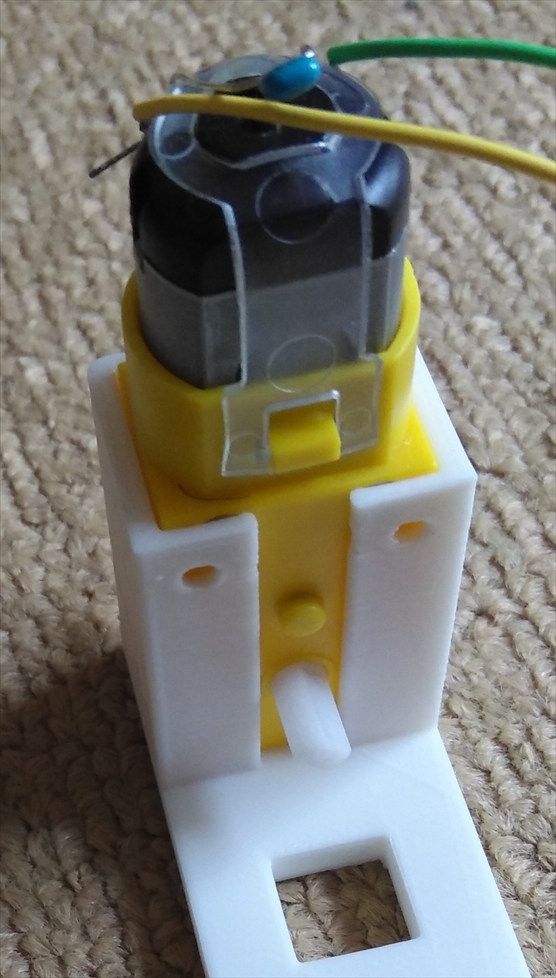
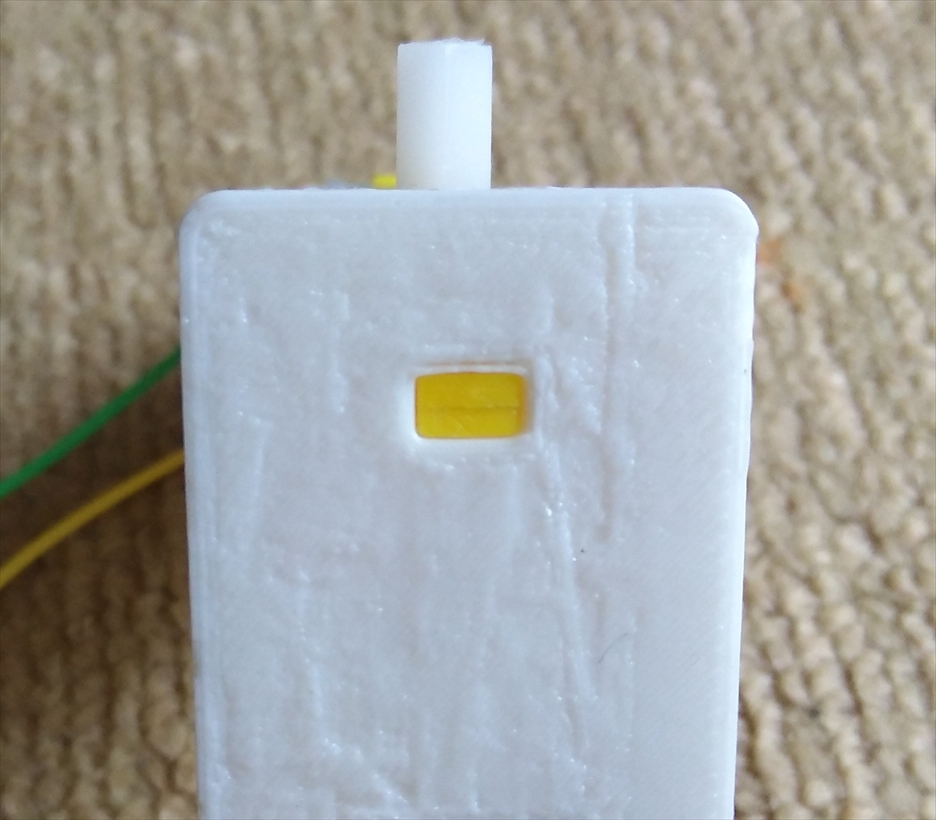
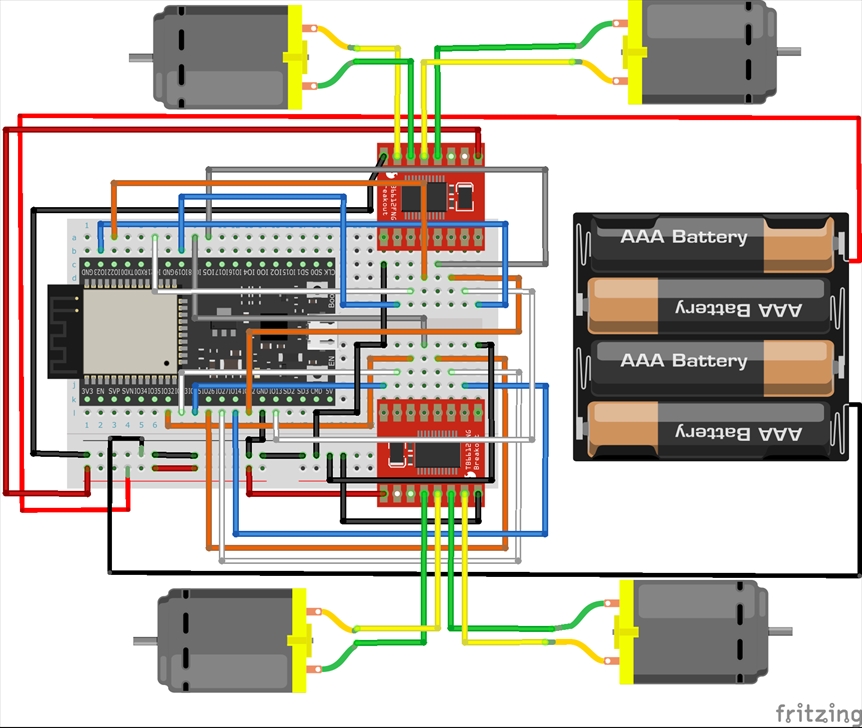
配線
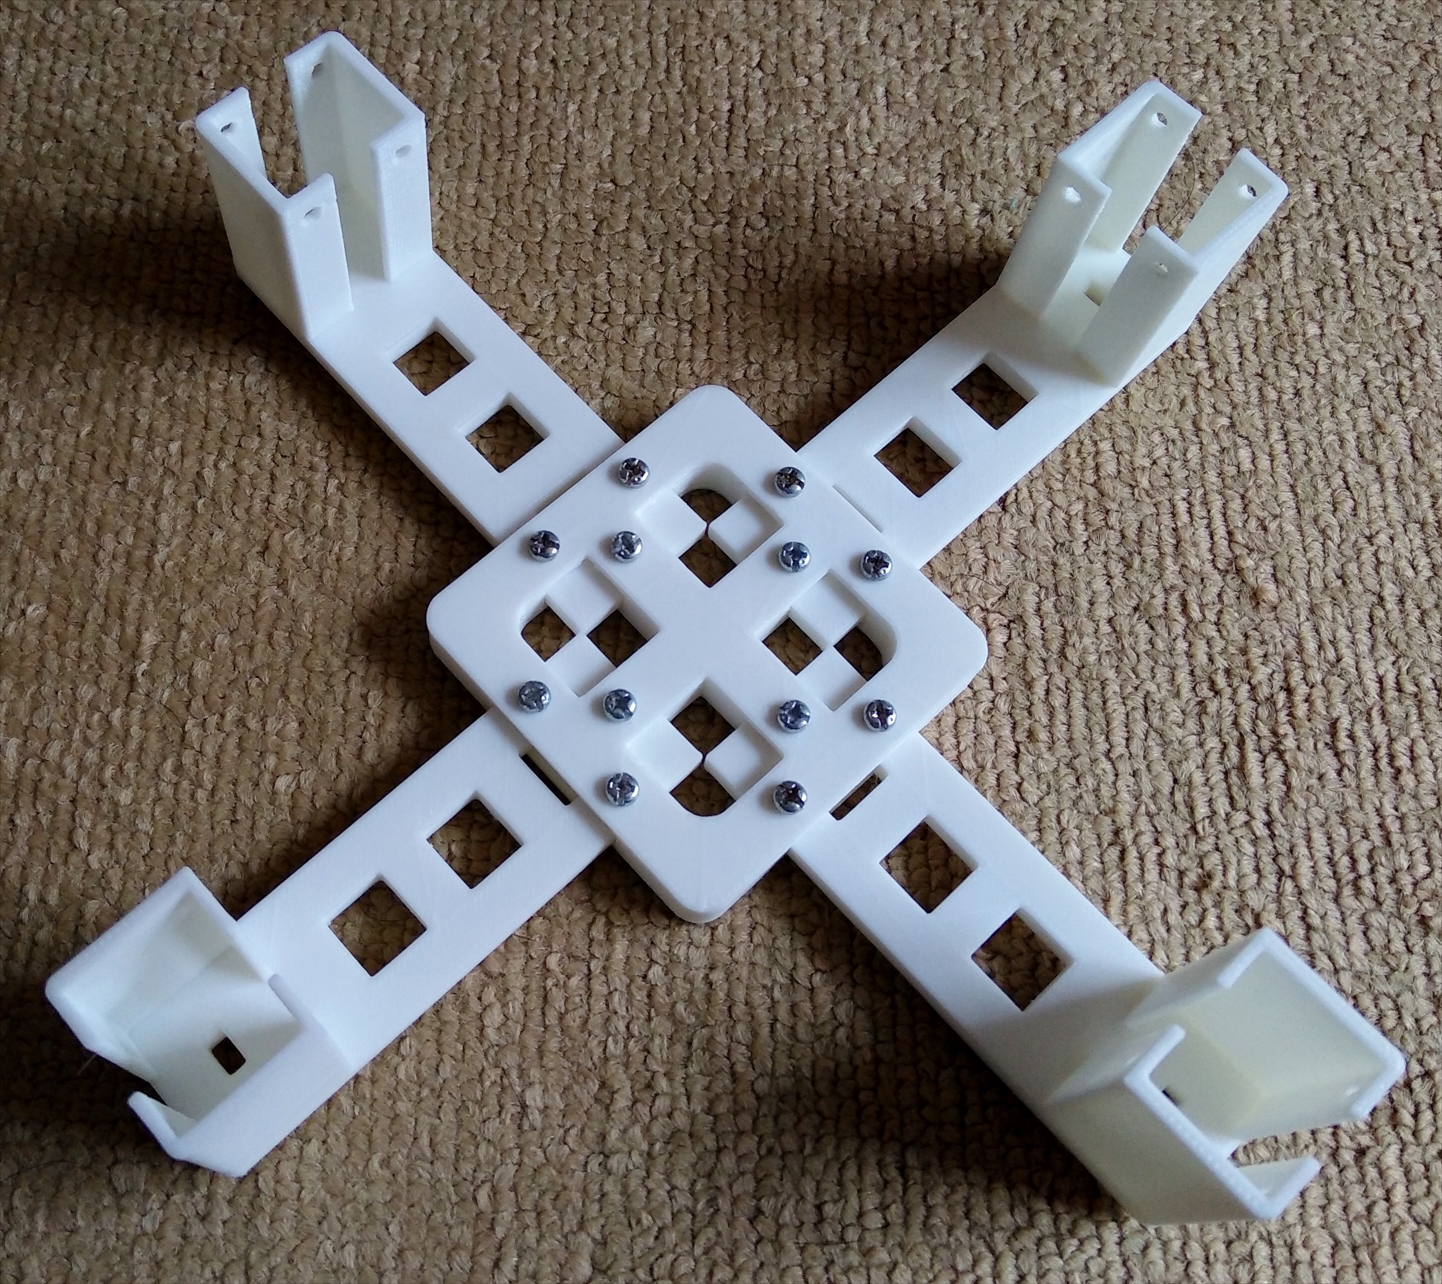
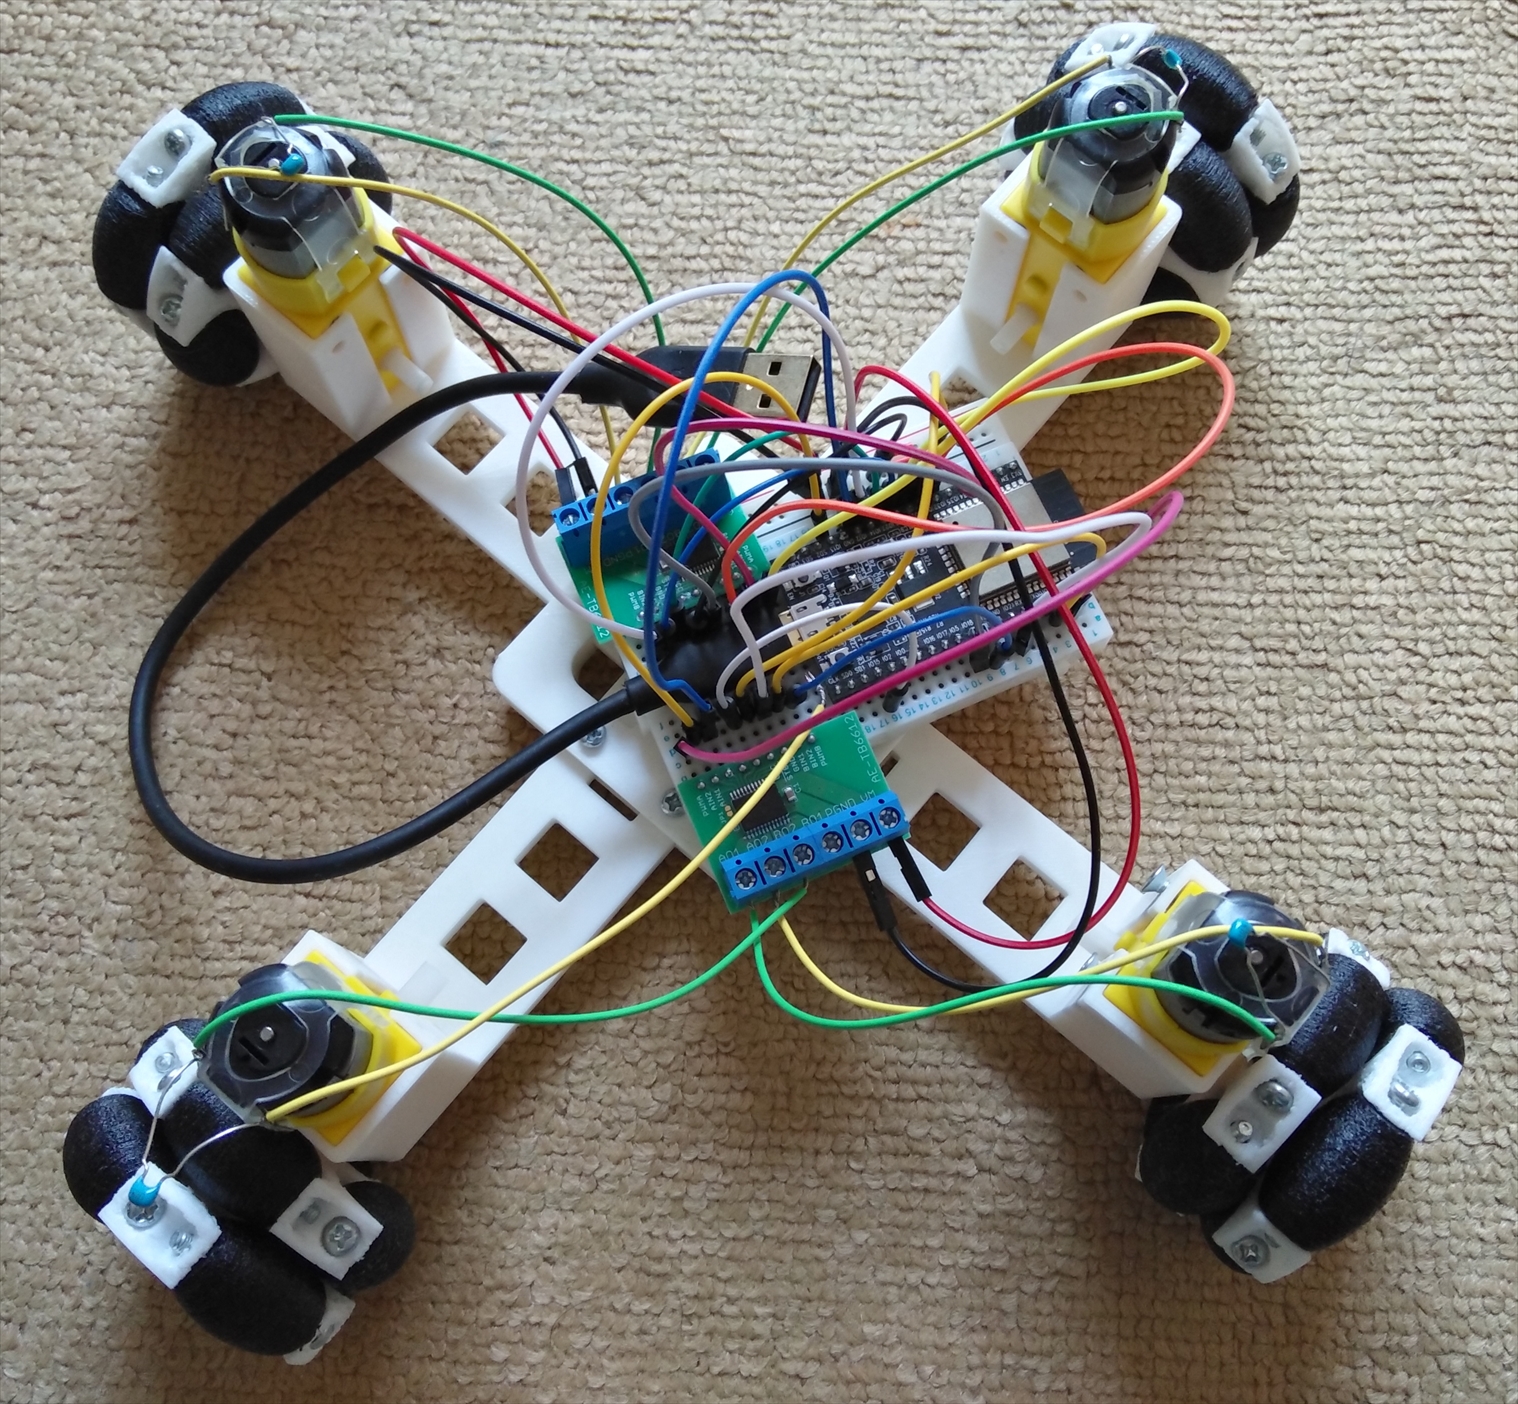
本体完成
プログラム
#include <WiFi.h>

const char* ssid     = "nova";
const char* password = "novanova";

const int AIN1_UL = 32;
const int AIN2_UL = 33;
const int PWMA_UL = 25;
const int BIN1_DL = 26;
const int BIN2_DL = 27;
const int PWMB_DL = 14;

const int AIN1_UR = 12;
const int AIN2_UR = 13;
const int PWMA_UR = 23;
const int BIN1_DR = 22;
const int BIN2_DR = 21;
const int PWMB_DR = 19;

const int STBY_L = 18;
const int STBY_R = 5;

const int CHANNEL_0 = 0;
const int CHANNEL_1 = 1;
const int CHANNEL_2 = 2;
const int CHANNEL_3 = 3;

const int LEDC_TIMER_BIT = 8;   // PWMの範囲(8bitなら0〜255、10bitなら0〜1023)
const int LEDC_BASE_FREQ = 490; // 周波数(Hz)
const int VALUE_MAX = 255;      // PWMの最大値

WiFiServer server(80);

/*void ledcAnalogWrite(uint8_t channel, uint32_t value, uint32_t valueMax = 255) {
  // calculate duty, 8191 from 2 ^ 13 - 1
  uint32_t duty = (8191 / valueMax) * min(value, valueMax);

  // write duty to LEDC
  ledcWrite(channel, duty);
}*/
void setup() {
    Serial.begin(115200);

    pinMode(AIN1_UL,OUTPUT);
    pinMode(AIN2_UL,OUTPUT);
    pinMode(BIN1_DL,OUTPUT);
    pinMode(BIN2_DL,OUTPUT);
    pinMode(AIN1_UR,OUTPUT);
    pinMode(AIN2_UR,OUTPUT);
    pinMode(BIN1_DR,OUTPUT);
    pinMode(BIN2_DR,OUTPUT);

    pinMode(STBY_L,OUTPUT);
    pinMode(STBY_R,OUTPUT);

    ledcSetup(CHANNEL_0, LEDC_BASE_FREQ, LEDC_TIMER_BIT);
    ledcSetup(CHANNEL_1, LEDC_BASE_FREQ, LEDC_TIMER_BIT);
    ledcSetup(CHANNEL_2, LEDC_BASE_FREQ, LEDC_TIMER_BIT);
    ledcSetup(CHANNEL_3, LEDC_BASE_FREQ, LEDC_TIMER_BIT);

    ledcAttachPin(PWMA_UL, CHANNEL_0);
    ledcAttachPin(PWMB_DL, CHANNEL_1);
    ledcAttachPin(PWMA_UR, CHANNEL_2);
    ledcAttachPin(PWMB_DR, CHANNEL_3);

    delay(10);

    // We start by connecting to a WiFi network

    Serial.println();
    Serial.println();
    Serial.print("Connecting to ");
    Serial.println(ssid);

    WiFi.begin(ssid, password);

    while (WiFi.status() != WL_CONNECTED) {
        delay(500);
        Serial.print(".");
    }

    Serial.println("");
    Serial.println("WiFi connected.");
    Serial.println("IP address: ");
    Serial.println(WiFi.localIP());

    server.begin();

    digitalWrite(STBY_L, HIGH);
    digitalWrite(STBY_R, HIGH);

}

int value = 0;

void loop(){
 WiFiClient client = server.available();   // listen for incoming clients

  if (client) {                             // if you get a client,
    Serial.println("New Client.");           // print a message out the serial port
    String currentLine = "";                // make a String to hold incoming data from the client
    while (client.connected()) {            // loop while the client's connected
      if (client.available()) {             // if there's bytes to read from the client,
        char c = client.read();             // read a byte, then
        Serial.write(c);                    // print it out the serial monitor
        if (c == '\n') {                    // if the byte is a newline character

          // if the current line is blank, you got two newline characters in a row.
          // that's the end of the client HTTP request, so send a response:
          if (currentLine.length() == 0) {
            // HTTP headers always start with a response code (e.g. HTTP/1.1 200 OK)
            // and a content-type so the client knows what's coming, then a blank line:
            client.println("HTTP/1.1 200 OK");
            client.println("Content-type:text/html");
            client.println();

            // the content of the HTTP response follows the header:
            client.print("<html>");
            client.print("<head>");
            client.print("<meta charset=\"UTF-8\">");
            client.print("<meta name=\"viewport\" content=\"width=device-width,initial-scale=1,minimum-scale=1\">");
            client.print("<style>");
            client.print("table td{ padding:15px; }");
            client.print("</style>");
            client.print("</head>");
            client.print("<body>");
            client.print("<table>");
            client.print("<tbody align=\"center\">");
            client.print("<tr><td><input type=\"button\" value=\"⇖\" style=\"font-size:32px;\" >


まとめ
- オムニホイールを自作した
- 自作オムニホイールを使ってWi-Fiラジコンを作った
- 次は、ドローンを作る
コメントを見る (0)